Not many would know, Windows Defender also has a Ransomware protection feature that defends your PC against various ransomware attacks. However, the ‘Ransomware Protection’ feature is disabled by default in Windows 10. Since Ransomware attacks were on the rise, it is essential to enable this feature. Ransomware is a type of malware infection that encrypts the data on your computer. Once encrypted, it demands a ransom in digital currencies like Bitcoins to decrypt them. Paid antivirus tools do have ransomware protection feature, but if you don’t want to use premium tools, then you need to enable this feature.
Steps to Enable Ransomware Protection Feature:
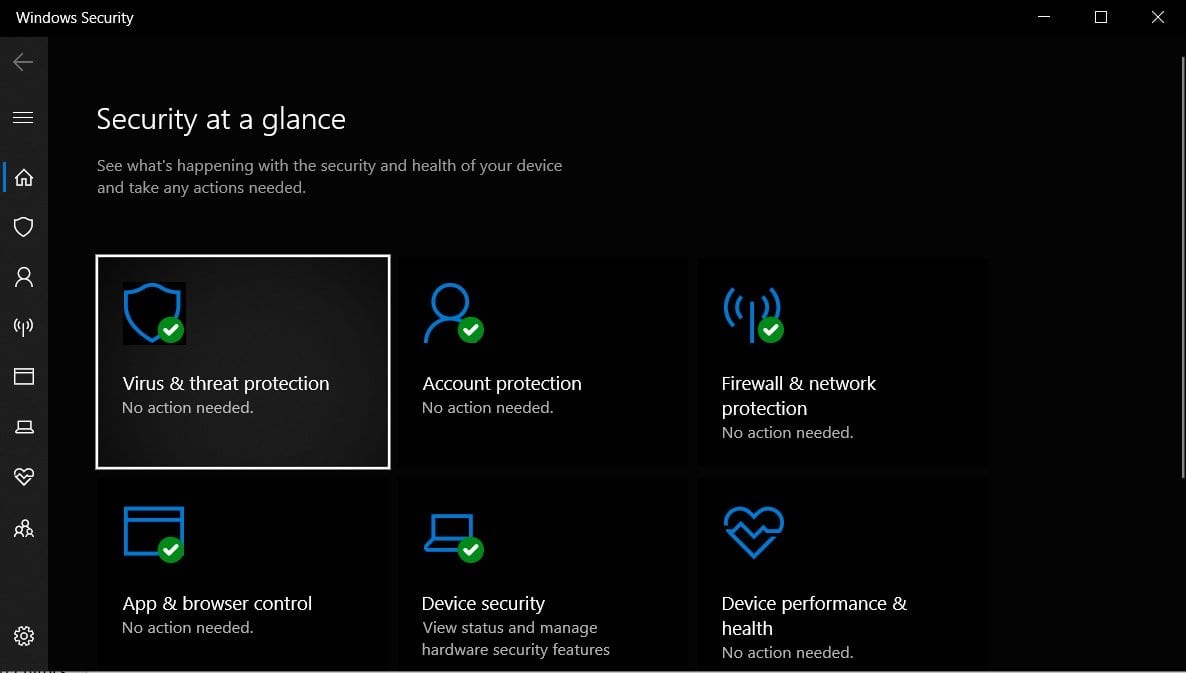
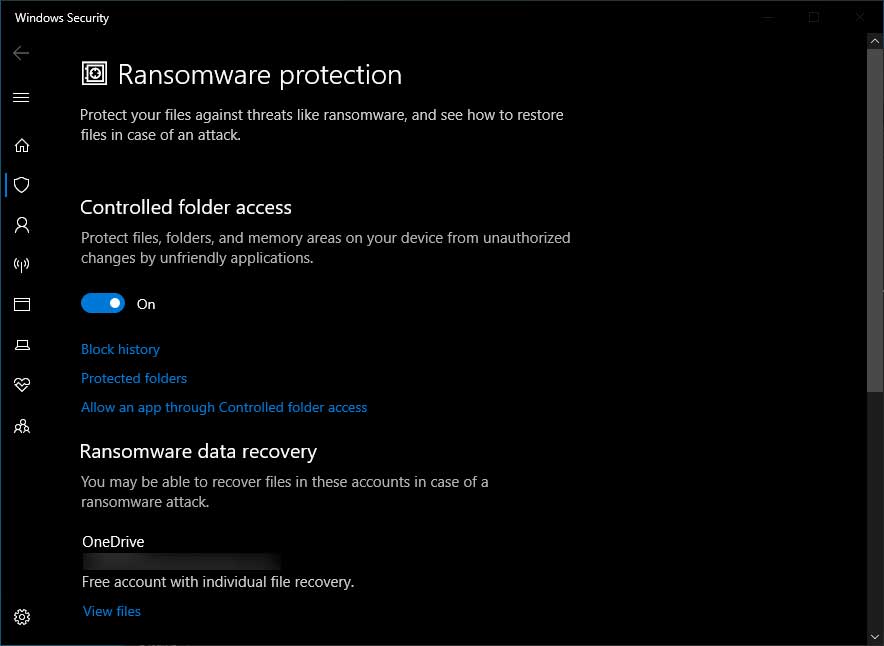
So, in this article, we have decided to share a working method to enable the ‘Ransomware Protection’ feature on Windows 10 computers. So, let’s check out how to enable Ransomware protection on Windows defender. Step 1. First of all, open the Windows 10 start menu and search for ‘Windows security’. Open the Security app from the list. Step 2. On the Windows Security, click on the ‘Virus & Threat Protection’ option. Step 3. Now scroll down and find the ‘Ransomware Protection’ option. Click on the ‘Manage Ransomware protection’ option. Step 4. You need to turn on the option ‘Controlled Folder Access’ Step 5. Once done, restart your PC. That’s it! You are done. This is how you can enable Ransomware protection on Windows 10 computers. So, this article is all about how to enable the ‘Ransomware Protection’ feature on Windows 10. I hope this article helped you! Share it with your friends also.