Almost every instant messaging apps now come with a ‘Self-Destructing’ Messaging feature. This is a feature that automatically removes the sent messages after a set time. Although the quality is beneficial, it’s not available on email apps. Let’s admit, there are times when we want to add an expiration date to emails in Gmail. Fortunately, that’s possible with Gmail’s ‘Confidential Mode.’ The confidential mode gives users an added security layer when sending emails to those who don’t know. Also Read: How to Recover Permanently Deleted Emails in Gmail
Steps to Send Emails with an Expiration Date in Gmail
You can utilize the Confidential mode of Gmail to set an expiration date for your emails. This article will share a detailed guide on how to send emails with an expiration date. Let’s check out. Step 1. First of all, login to your Gmail account from your web browser.
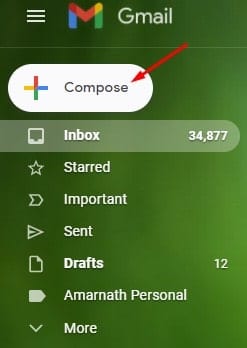
Step 2. Now click on the ‘Compose’ button to compose an email.
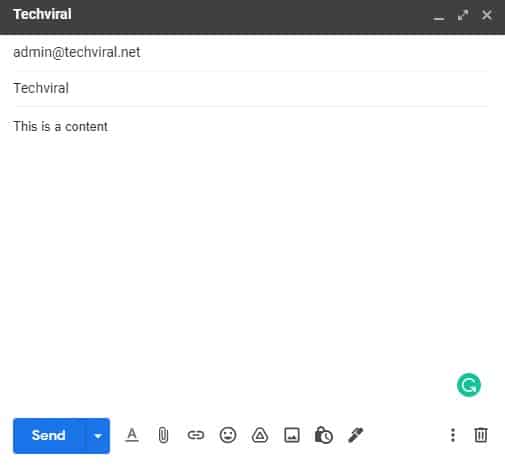
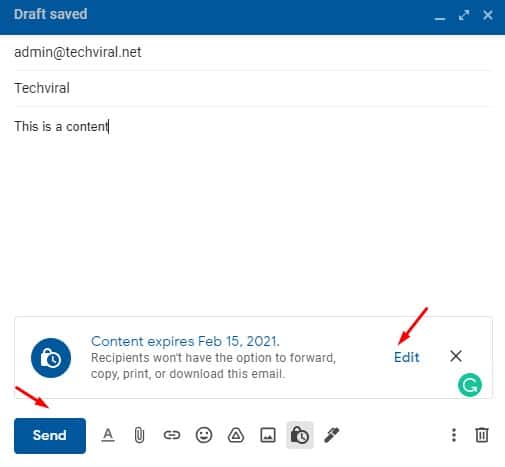
Step 3. In the email composition Window, enter the recipient’s email address, subject, and the content of the email.
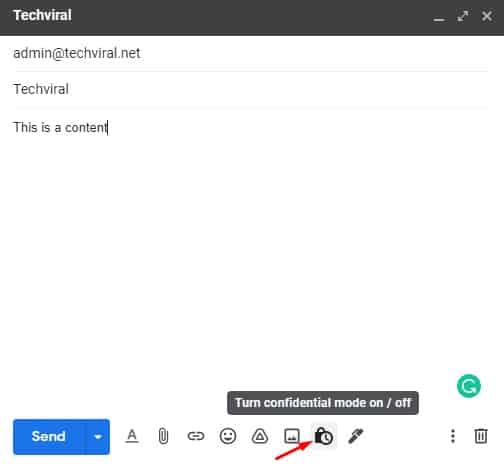
Step 4. At the bottom, you need to click on the lock button that has a clock in front of it.
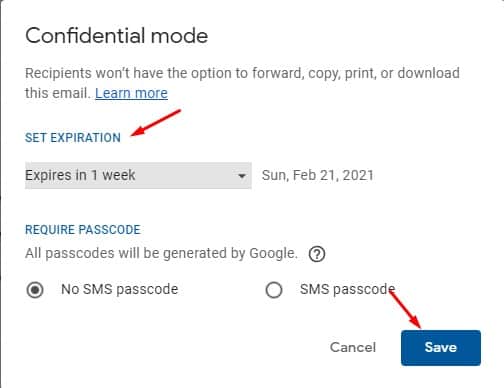
Step 5. This will enable the ‘Confidential Mode’. In the Set Expiration section, select the expiration time. You can select different expiration time ranging from one day to five years.
Step 6. On the Require passcode field, select ‘No SMS Passcode’ option and then click on the ‘Save’ button. Step 7. The email will now have an expiration date. Just click on the ‘Send’ button to send the email.
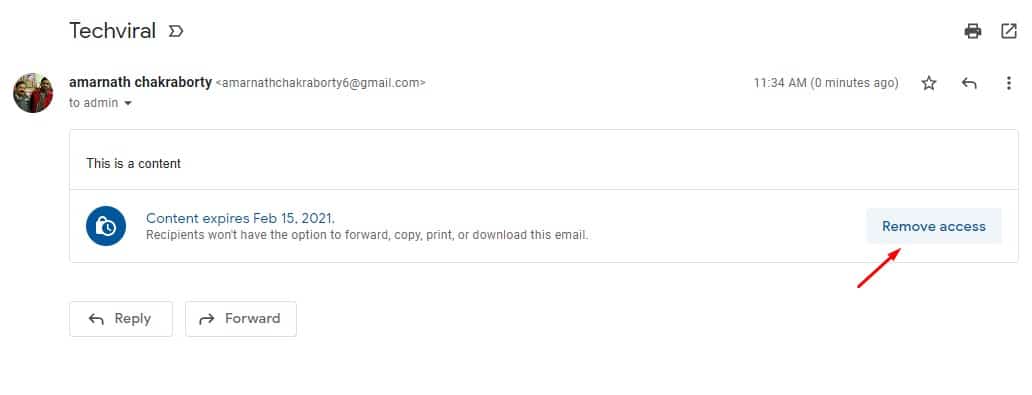
Step 8. If you don’t want to wait until the expiration date, you can remove email access immediately. For that, open the sent email and click on the ‘Remove Access’ option.
That’s it! You are done. This is how you can add an expiration date to emails in Gmail. So, this article is all about how to send emails with an Expiration date in Gmail. I hope this article helped you! Please share it with your friends also. If you have any doubts related to this, let us know in the comment box below.
